How to Use the Ab Wheel Correctly

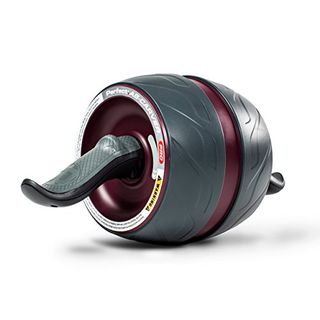
Today’s ab routines are more versatile than ever. Sure, you can slog through sets of situps and rounds of planks over and over again. But, more and more, core workouts incorporate tools like Swiss balls, medicine balls, dumbbells and kettlebells. And if you’re looking for one more way to mix up that ab training, then it’s time to consider the ab wheel.
It’s easy to forget the ab wheel, a classic ab-training implement that’s been around for years. But this is a tool that you definitely want to make use of. Why? Because, perhaps more than any other core workout gadget, the ab wheel gives you a chance to train your entire core (abs, gluten, lower back muscles, and obliques) as a unit. Your core functions this way—as a unit—in real life, so any opportunity to train it that way is beneficial.

The best thing about the ab wheel is how it trains something called “anti-extension.” Your core, as a unit, is responsible for a quintet of key actions. It helps rotate your torso (as you do during Russian twists). It resists rotation, an idea called “anti-rotation,” which you fight during Pallof holds. It also braces your spine (think: planks and hollow holds), and it flexes your spine, too (as it does during classic situps.
Then there’s the idea of “anti-extension,” and that’s all about keeping you from over-arching your back. Yes, arching your back can be a good stretch, and in some situations, you want to do it. But it’s a set of strong abs and obliques that prevent you from living in that arched-back position, and in doing so, they protect your spine and let you build shoulder mobility. If it wasn’t for your abs keeping your back from arching constantly, you’d constantly be stressing your lower back on every exercise.
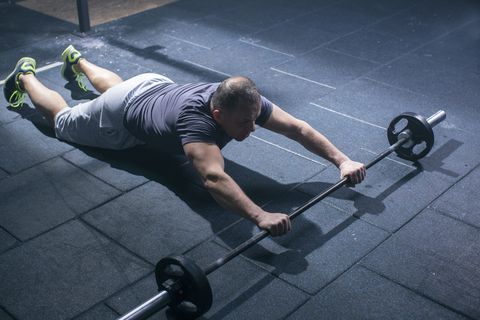
Anti-extension can be trained in other ways, too (think of plank walkouts and weighted hollow holds). But the ab wheel lets you challenge that anti-extension in new ways. It’s a simple tool, too. If you don’t have access to an ab wheel, you can almost always DIY one, using a barbell with rounded plates for “wheels,” or even using a towel or sliders on a super-smooth floor.

The ab wheel rollout isn’t easy to do, though—or at least it isn’t easy to do correctly. Take your time to work through a proper progression for the rollout; it will protect your back in the long run while building critical core strength.
Ab Wheel Rollout Progression
The key mistake people make when they do ab wheel rollouts: They over focus on rolling out as far as possible when they first get started. That’s a recipe for lower back pain, though. You have to learn to feel your abs battling lower back extension before you do the full ab wheel rollout; if you don’t, you place undue stress on your spine.
Incline Bench Rollouts
Avoid that by starting with an incline bench progression. Set the bench to a 30-degree incline to kick off your rollout practice. Get into a strong standing plank position, with your glutes and abs engaged, holding the ab wheel on the bench’s seat. Extend your arms straight out to roll the wheel up the bench slowly over a five count, maintaining the solid plank position as it moves upward.
Keep a soft bend in your elbows and go only as far as you comfortably can. If you’re somebody who who has shoulder issues, don’t straighten your arms all the way. The ab wheel rollout shouldn’t cause shoulder pain.
Throughout the movement, focus on keeping your core tight and keeping your in an ever-so-slightly rounded position. Keep tightening your abs, and the farther you roll your arms forward, the more you should tighten your abs. Doing so actively teaches your abs how to work for “anti-extension.”
Kneeling Rollouts
Try that series until you feel comfortable with the position, then lower the bench until it’s in the standard position. Then, you’ll be ready for the floor, where the actual exercise takes place. To save your knees, you’ll want a yoga mat or pad to kneel on.
Once you’re on the ground, your main focus will be maintaining your strong position while you roll out, fighting the forces that would make your lower back hyperextend and your hips slouch forward. Contract your abs aggressively and actively, even if you feel like you don’t need to. Rolling out isn’t hard. Rolling out while controlling your lower back position is the challenge.
Perform the same movement, again focusing on keeping the rollout slow and controlled, squeezing your core to pull the wheel back toward yourself. For now, you should disregard the final progression of the video below, the standing rollout, until you’ve built up the strength performing the more standard kneeling version.
Take Your Time
Once you’re on the ground, you might see guys huffing and puffing as they speed through reps of the movement as quickly as they can. They’re working in all the wrong ways. You’re better served with slow, deliberate movements—as demonstrated here by Athlean-X’s Jeff Cavaliere, C.S.C.S.
Cavaliere notes that the key here is all in the hips, like so many other exercises. Once you set your hips, you shouldn’t flex past that point, and you shouldn’t allow your butt to sit back on your feet. You’re also setting your hips to make sure that they don’t take the dominate the movement—your abs should also be helping to extend and return the wheel. This takes focus, and it won’t be easy, but you’ll reap the core benefits.

Source: Read Full Article